WEB DESIGN 2 ASSIGNMENTS (subject to change)
https://creativecloud.adobe.com/cc/learn/app/audition?x-product=CCHome&x-product-location=Apps&guid=45602460-1c68-448e-8bbe-650fd902d93d&context_guid=4e717bac-b620-47e6-bafc-f1f55c19d7cf&promoid=QGMZPG6T&mv=other&mv2=cch&locale=en
Apr 15
Complete the following
- https://wordpress.com/learn/courses/getting-started/start-here/
- https://wordpress.com/learn/courses/create-your-site/
- Click Up next → on the bottom right of each page when you are done.
Old Word Press (not functioning?)
WordPress Tutorials: https://wordpress.com/learn/
- Go through each of the 14 steps on the left.
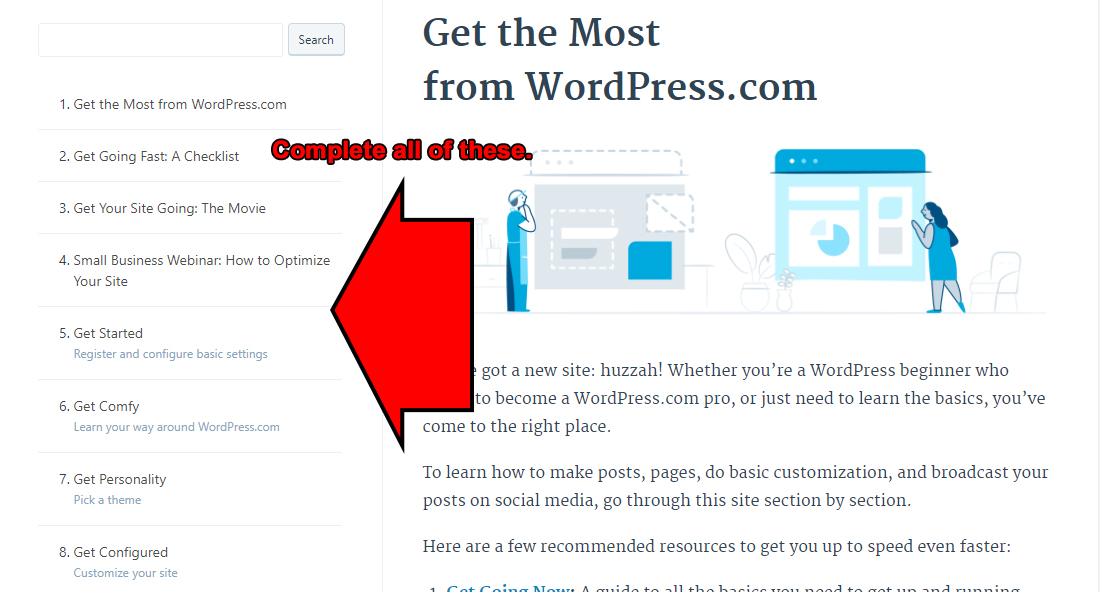
- 1-Get the Most from WordPress.com
- Just read, no need to click on anything here.
- 2-Get Going Fast: A Checklist
- Make sure you complete the 5 steps under "Get started: register, fill in your profile, and name your new creation".
- Send me the URL you selected via email. Mine is ronespinola.wordpress.com DUE:
- Obviousy we are doing the Free site.
- Make sure you add a Gravatar, you can prove this by sending a screen shot. DUE:
- Read through all of this so you are familiar with it, most of the customization will be done later. You do need to pick a new theme.
- 3-Get Your Site Going: The Movie
- Please, please watch the movies.
- 4-Small Business Webinar: How to Optimize Your Site
- Yes, the video is long. There is a lot of terminology and things we really don't cover but are great concepts for website design. Probably things that are on the end of sequence assessment.
- Please watch it. Remember you can speed it up.
- There are also slides that cover the material but they don't make a lot of sense without the commentary.
- To verify you watched it send me two paragraphs via email with the subject "Small Business Webinar" summarizing two important concepts you learned. DUE:
- 5-Get Started Register and configure basic settings
- If you did not do any of this in the earlier step make sure it is done now.
- 6-Get Comfy Learn your way around WordPress.com
- We are focusing on the website aspect more than the blog part of Wordpress. However, add my Wordpress site to follow as well as those of the rest of the class.
- Student URLs are at http://www.respinola.com/students/index.htm, assuming they have sent them to me.
- 7-Get Personality Pick a theme
- Send me an email telling me to look at your new theme. Include the name of your theme in the email. DUE:
- 8-Get Configured Customize your site
- Create/install a custom header. This may not work properly. Therefore is optional.
- Create/install a custom logo. There is a link to a logo creator that you can try. You need to show me this. Send me an email telling me you are done so I can look at your site. DUE:
- Also create/install a custom site icon...favicon. This is inside the Site Identity area ins the Customize Tab. You need to show me this. Send me an email telling me you are done so I can look at your site. DUE:
- Since we are using the free version, we cannot customize fonts or CSS.
- 9-Get Published Create posts, pages, and menus
- Make sure you go to the link in the reading, https://wordpress.com/support/pages/. We are more concerned about pages than posts. You are not making a blog. However, follow the directions and create a blog post. Show me for credit. DUE:
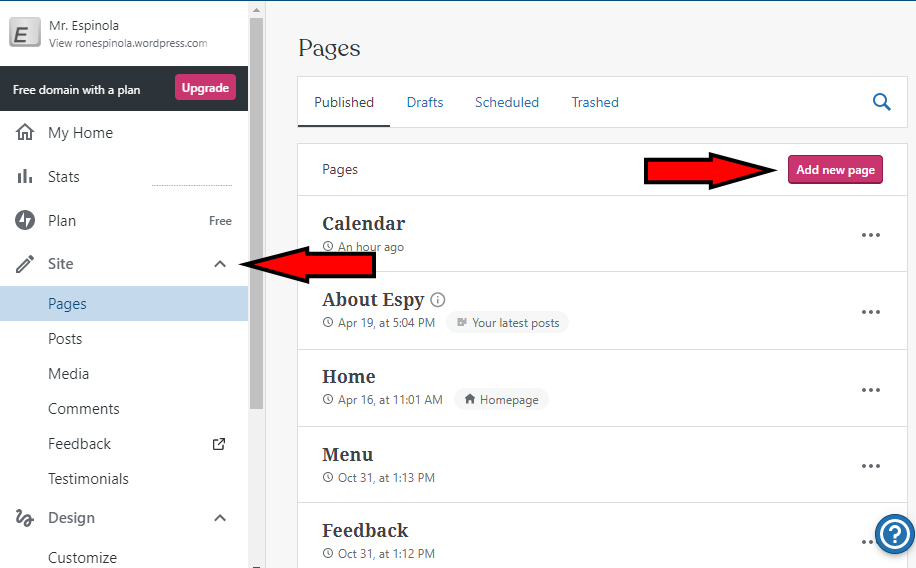
- In the Creating Pages section you are going to create one new page. Currently, the post you just created should be on the bottom of your homepage. You're going to create a page to contain your blog posts. https://wordpress.com/support/pages/#creating-a-blog-page
- Send me the link to your new page for credit. DUE:
- Remove the post from your homepage.
- To accomplish this, in the My Site area click on Customize and then Widgets.
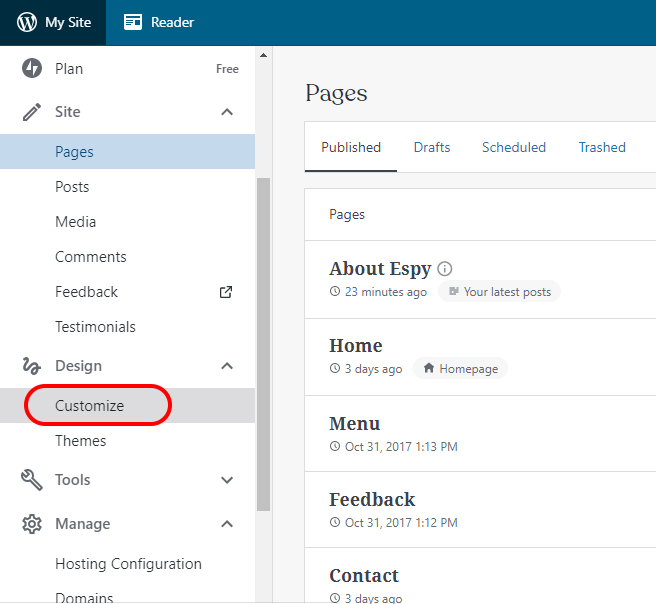
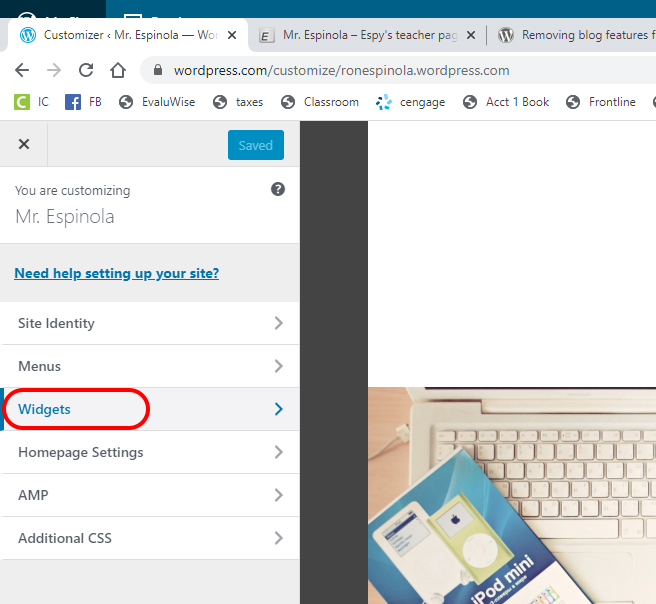
- From here remove all of the widgets associated with the blog post.
- Send a link to your home page via email to show that the blog post has been removed from your homepage. Subject should be blog removed. DUE:
- Create a Menu

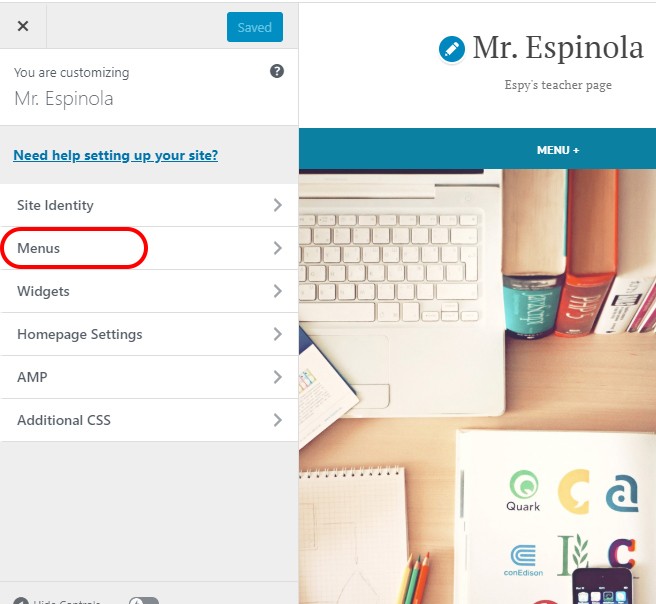
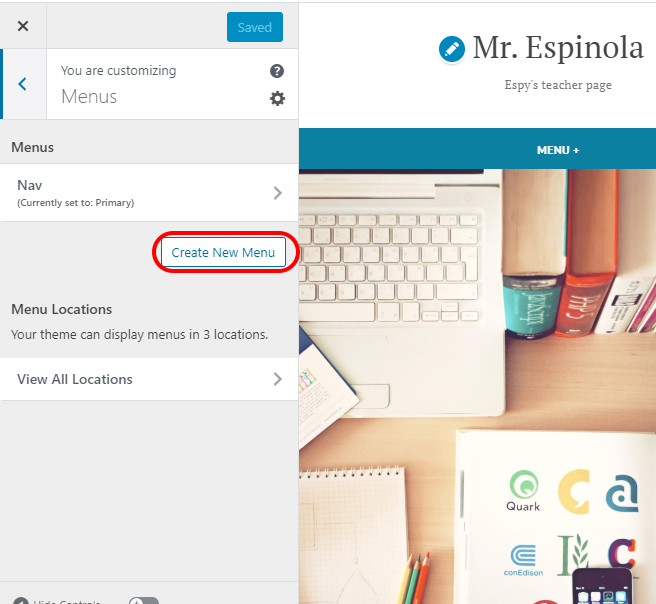
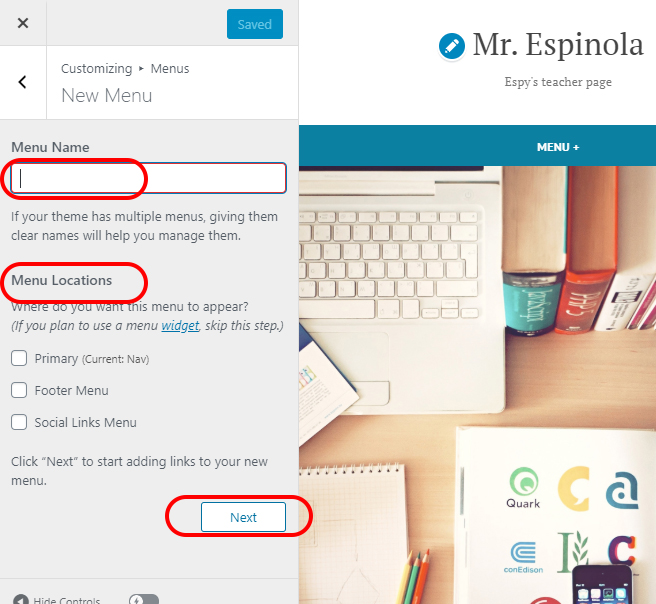
- From this point, follow the onscreen directions and look at the preview of the menu. Send a link to your home page via email to. The subject should be menu. DUE:
- 10-Get Flashy Enhance your site with widgets
- Create a new page that contains three widgets.
- Use at least one social media widget. It does not have to be to your account.
- I also used options in the Embed tools

- My example...https://ronespinola.wordpress.com/calendar/
- You can also insert the widgets in the widget area of your site as the directions cover. For example the wdiget are for my site is oin the footer but they do not display well there. DUE:
- Create a new page that contains three widgets.
- 11-Get Connected Explore the community and get noticed
- 12-Get Mobile Blog on the Go
- 13-Get Lingo
- Take the quiz in Google Classroom DUE:
- 14-Get a Homepage
- 1-Get the Most from WordPress.com
Jan 18
Final: Build a Business Website Tutorial
Recreate a site using WordPress
- Objective: Build a responsive website using Wordpress, a Content Management System (CMS)
- lowryhighschool.com or https://www.hcsdnv.com/o/lhs
- Take content from either site to create your pages.
- The site must be completely functional.
- You must make the home page as well as individual pages to demonstrate the appearance as well as the function of subpages and different content areas of the site.
WordPress using GoDaddy
- Objective: Build a responsive website using Wordpress, a Content Management System (CMS)
- Install Wordpress app on Go Daddy-Espy
- Log into the admin area from the email you received.
- For example: http://respinola.com/ruiza/wp/wp-admin/
- Example WordPress sites
- Choose one of the sites at https://wordpress.org/showcase/ to replicate.
- Show me the site you are using.
- Recreate the layout of the site, not the content.
- You must have a minimum of 10 pages.
- The site is for a local governmental agency or a nonprofit.
- Use at least five plugins of your choice. One can be a backend utility such as a page editor.
- You must edit the CSS. Create notes as proof of the edits.
- The content (including images) cannot be placeholder or filler.
Other WordPress Tutorials/Support (not required)
- https://www.wpbeginner.com
- How to Create a Website with WordPress (step by step): https://www.wpbeginner.com/guides/
- WordPress from OS Training
https://www.ostraining.com/class/wp-beginner/
- Using WordPress.com to Create a Website
http://en.support.wordpress.com/using-wordpress-to-create-a-website/
- Tutorials
https://en.support.wordpress.com/video-tutorials/
Other tutorials (not required)
- How to Create a Website: An easy, step-by-step guide from a web developer
- Wedding Film School (YouTube channel)
- How to Install a Premium Wordpress Theme with GoDaddy
- How to Build and Design a Wordpress Website with GoDaddy
- WP Smackdown (YouTube channel)
- Greg Narayan (YouTube channel)
Mar 11
Responsive Web Design Chapter 10
- Practice: Follow the directions DUE: April 5
- Analyze Correct Improve DUE; April 8

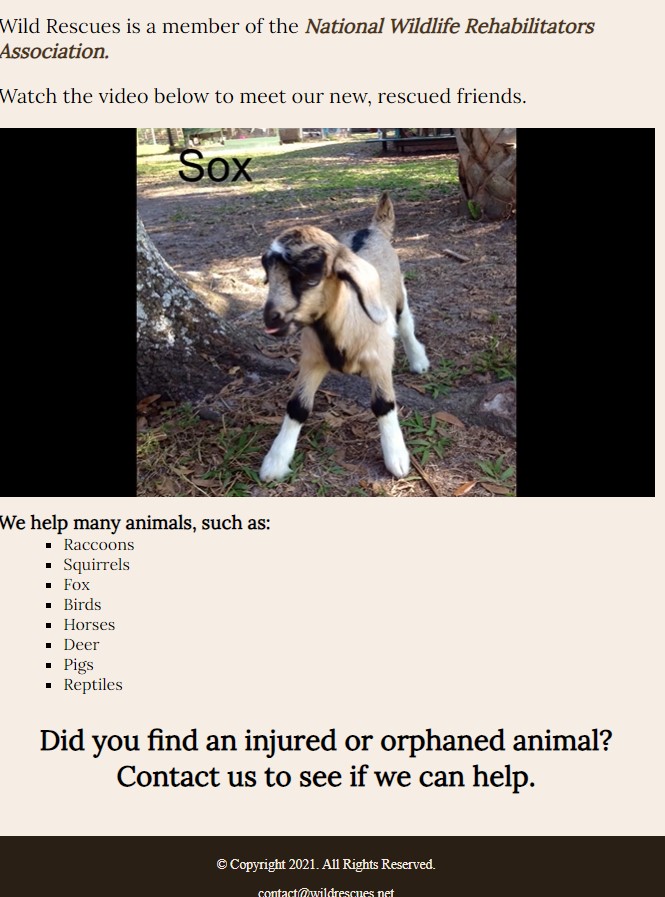
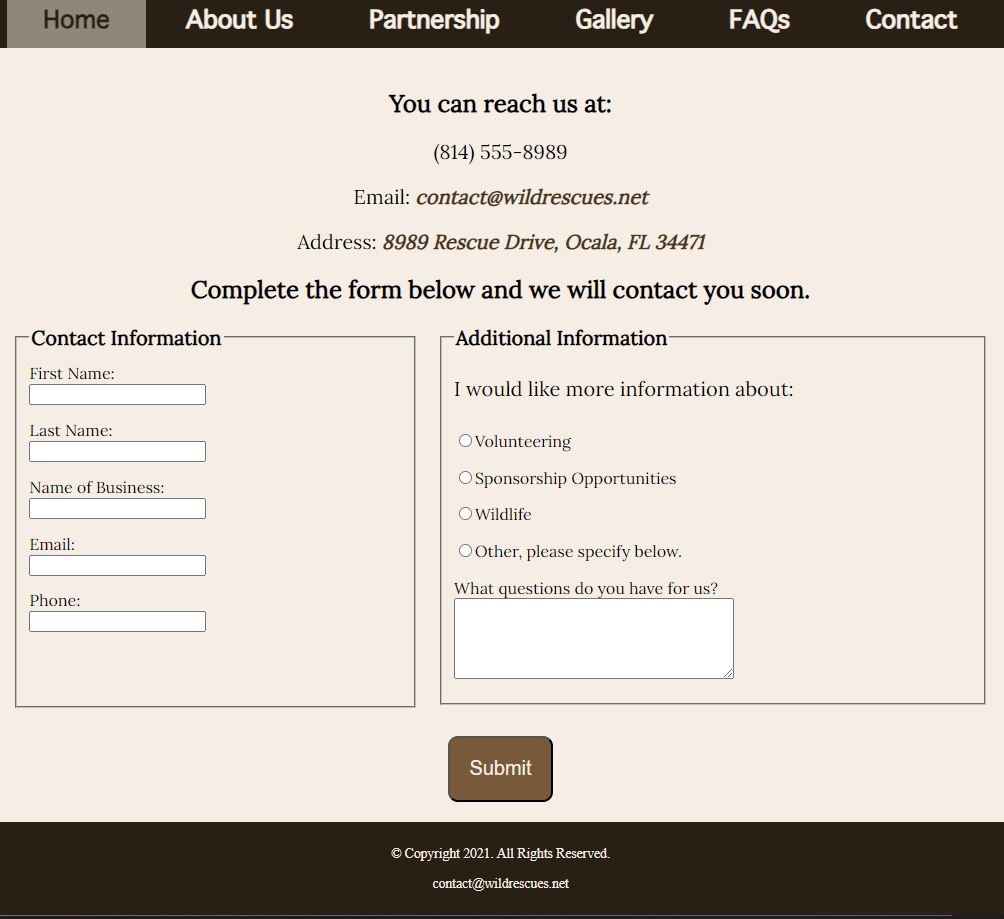
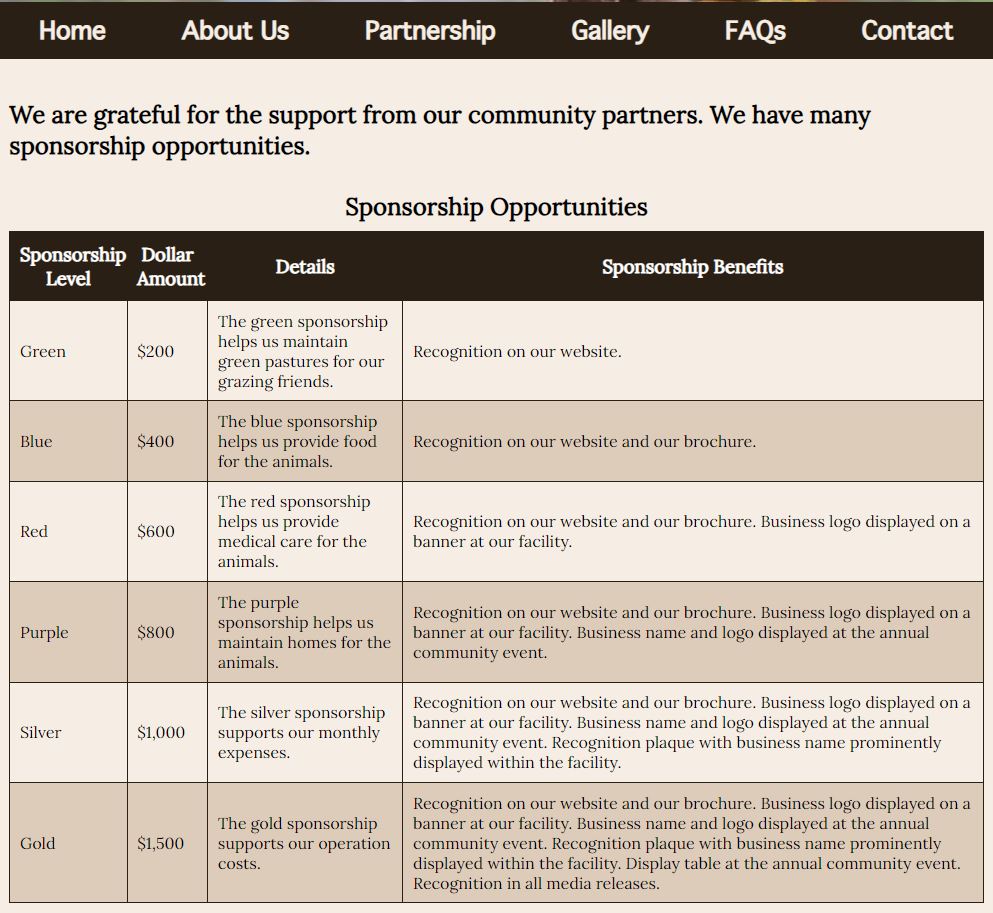
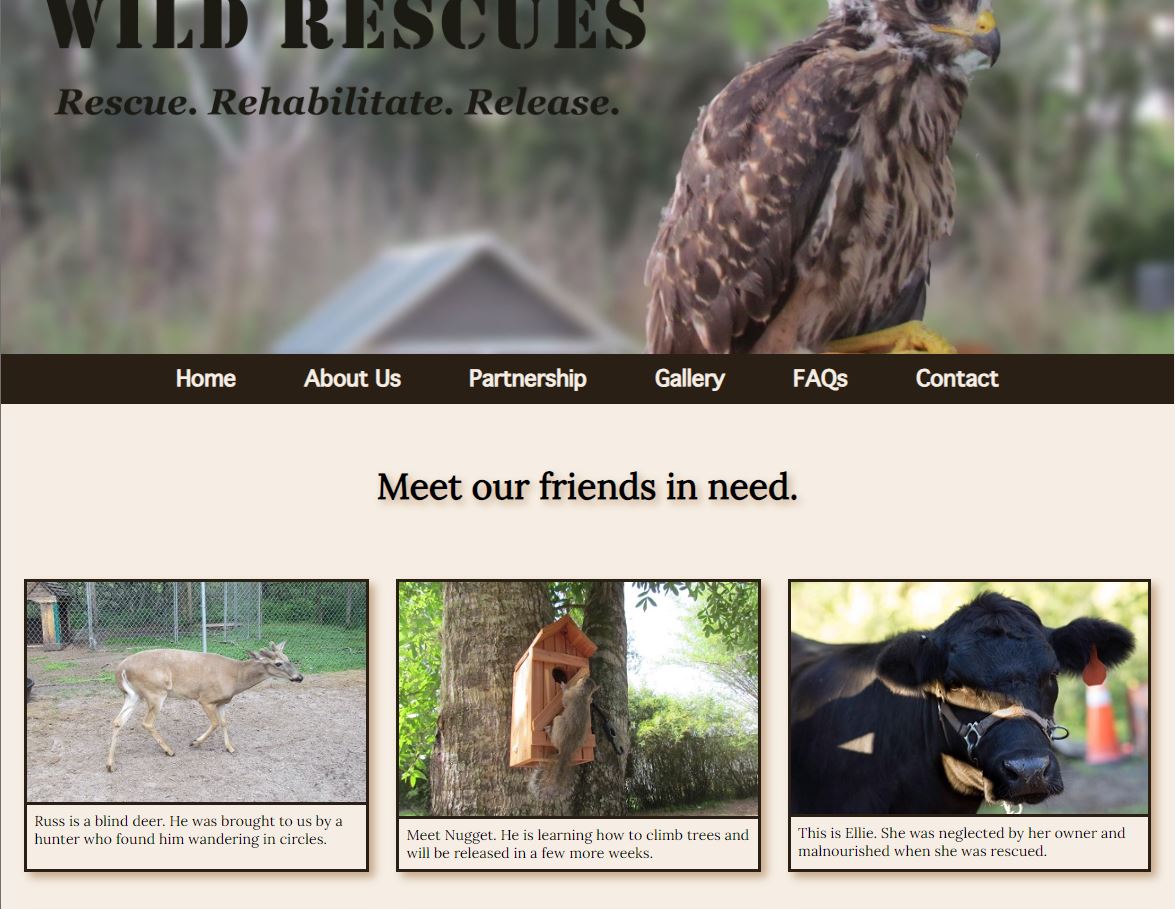
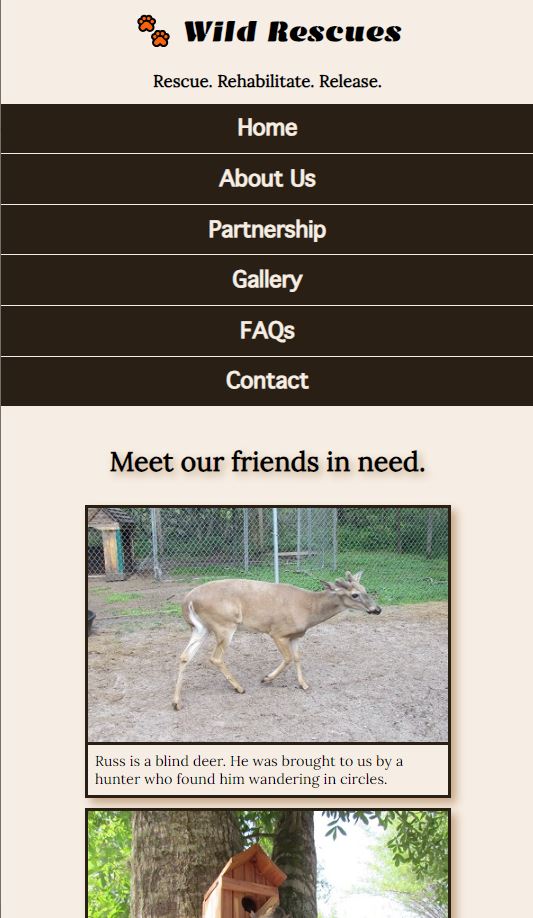
- Lab 2: Wildlife Rescue Organization DUE: April 12
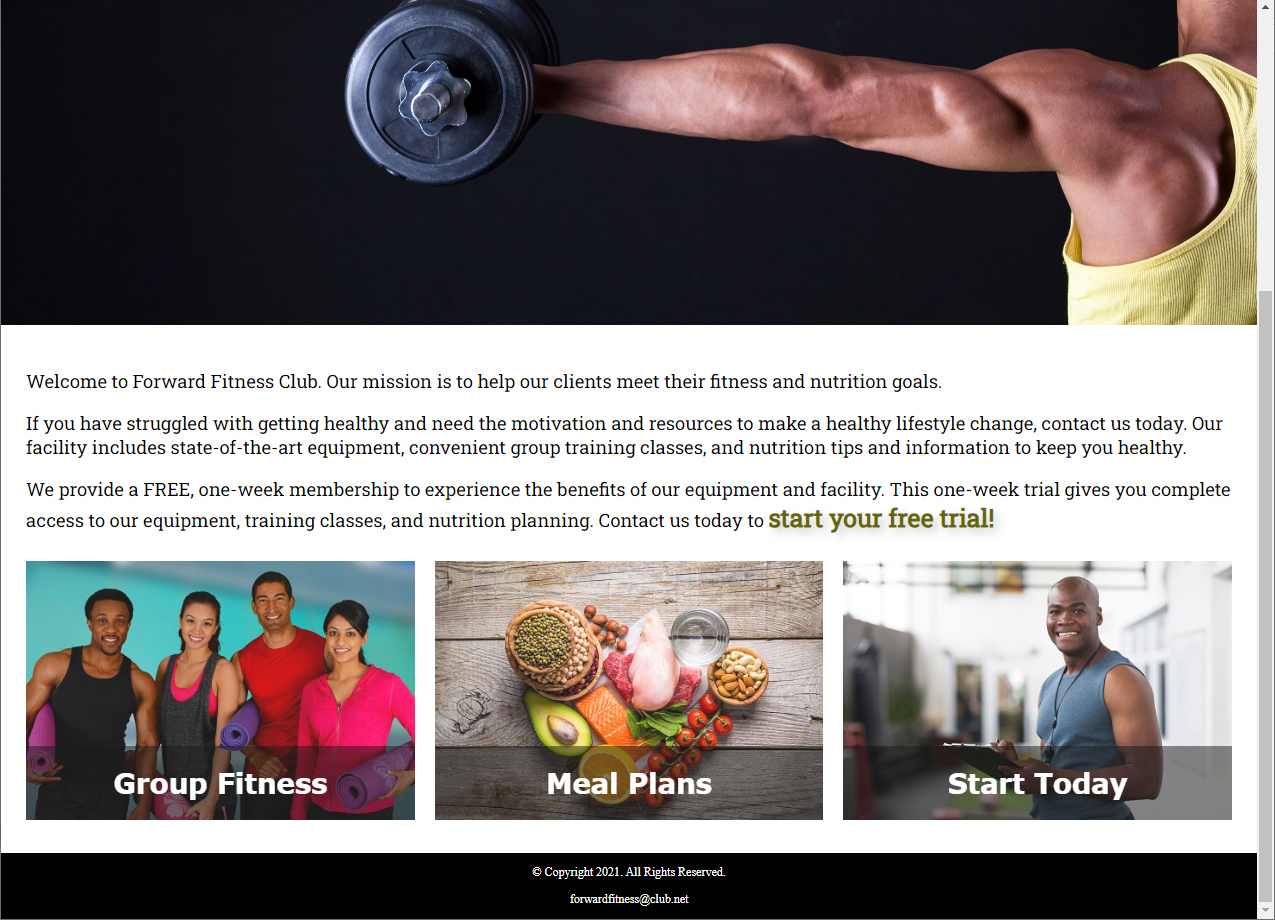
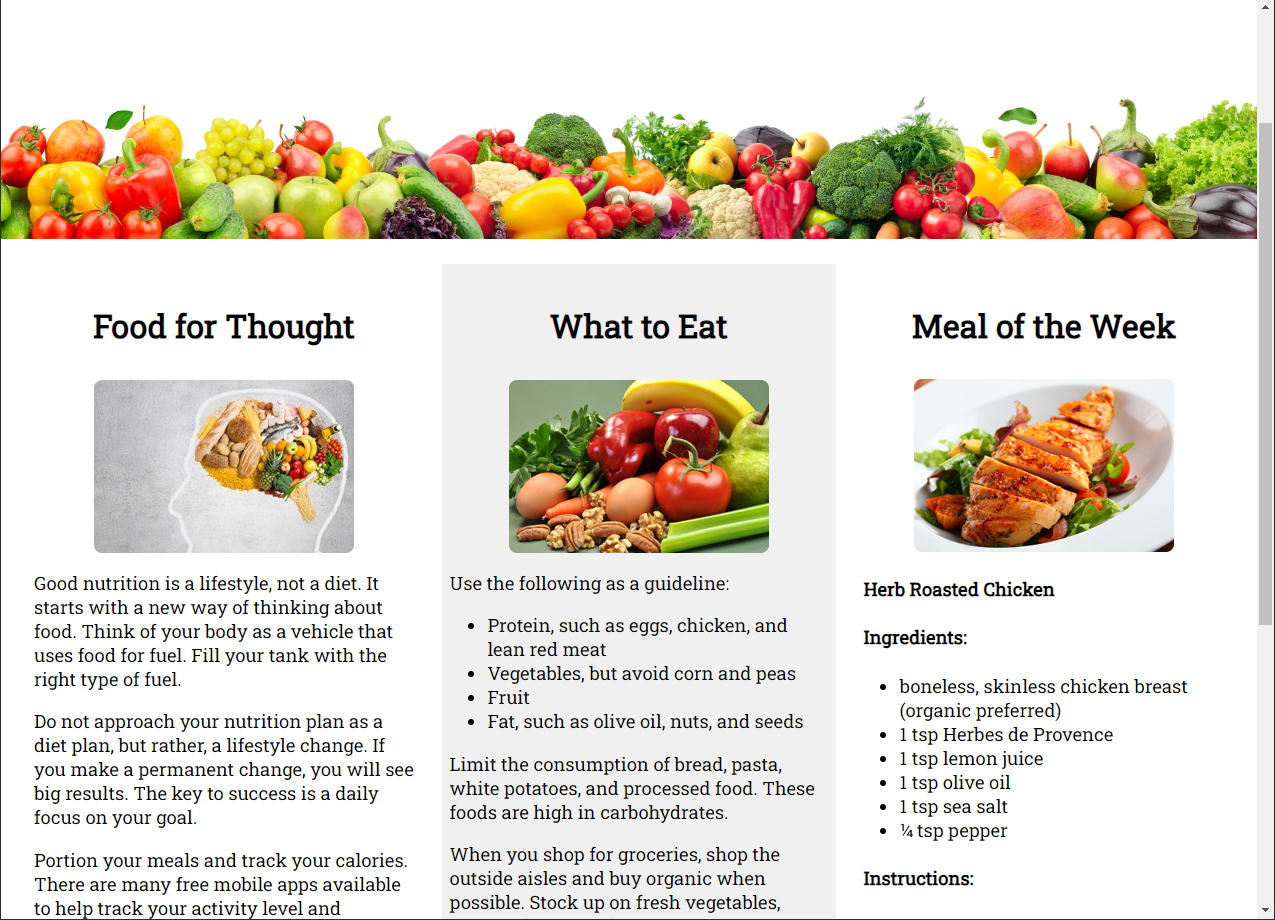
- Your Turn: Personal Portfolio Website DUE: April 17
May 10
Editing audio-Using Audition
- https://creativecloud.adobe.com/cc/learn/app/audition?x-product=CCHome&x-product-location=Apps&guid=45602460-1c68-448e-8bbe-650fd902d93d&context_guid=4e717bac-b620-47e6-bafc-f1f55c19d7cf&promoid=QGMZPG6T&mv=other&mv2=cch&locale=en
Adobe Video Tutorials: https://helpx.adobe.com/premiere-pro/tutorials.html
Using Adobe Premiere to create Videos
Premiere Pro Get Started course
- Create a project and import a clip
- Watch, 18 min
- Explore Premiere Pro panels
- Watch, 13 min
- Learn editing skills
- Watch, 21 min
- Work with graphics and titles
- Watch, 13 min
- Adjust the timing of your edits
- Watch, 11 min
- Change the look of your clips
- Watch, 15 min
- Add effects
- Watch, 16 min
- Work with audio
- Watch, 15 min
- Work with your clips
- Watch, 15 min
Import media course
- Import with the Media Browser
- Watch, 9 min
- Import media directly
- Watch, 9 min
- Relink offline clips
- Watch, 8 min
- Multi-layered Photoshop files
- Watch, 8 min
- Mixed footage
- Watch, 9 min
- Mixed frame rates
- Watch, 8 min
- Export video in multiple formats
- Watch, 8 min
- Watch, 8 min
Work with animation course
- Adjust the anchor point
- Watch, 10 min
- Explore Bezier keyframes
- Watch, 7 min
- Create animated effect presets
- Watch, 7 min
- Looping animated backgrounds
- Watch, 10 min
- Animate a layered title fly-in
- Watch, 8 min
Essential color adjustments course
- Adjust contrast, highlights, and shadows
- Watch, 7 min
- Discover the Lumetri Curve controls
- Watch, 8 min
- Make natural color adjustments
- Watch, 6 min
- Get ready for clip comparison
- Watch, 4 min
- Automatically match clip colors
- Watch, 3 min
- Copy and paste effects
- Watch, 5 min
Understanding audio mixes course
- Understand audio level
- Watch, 5 min
- Discover audio effects
- Watch, 4 min
- Automatic audio ducking
- Watch, 5 min
- Mix multichannel audio
- Watch, 5 min
- Adjust audio track volume
- Watch, 5 min
- Discover the Audio Track Mixer
- Watch, 5 min
- Reduce noise and reverb
- Watch, 5 min
- Advanced noise and reverb reduction
- Watch, 5 min
Create new sequences course
- Personalize the Timeline panel
- Try it, 5 min
- Automate to sequence
- Try it, 5 min
- Freeform storyboards
- Try it, 5 min
- Top and tail clips
- Try it, 4 min
- Three-point edits
- Try it, 5 min
- Quick transitions
- Try it, 5 min
Create beautiful visual composites course
- Discover compositing
- Watch, 5 min
- The Ultra Key effect
- Watch, 5 min
- Precise clip masks
- Watch, 5 min
- Add a Track Matte key
- Watch, 5 min
- Discover blend modes
- Watch, 4 min
Add transitions course
- Add transition effects
- Watch, 5 min
- Modify transitions
- Watch, 5 min
- Apply transition effects to video and audio
- See how, 2 min
Beginner projects
- Add a Look to your clips
- See how, 5 min
- Create an action sequence
- See how, 5 min
- Import a range of media types
- See how, 5 min
- Animate a rotating graphic
- See how, 8 min
- Match clip color in a scene
- Try it, 5 min
- Change footage properties
- Try it, 5 min
- Get creative with unusable footage
- Try it, 5 min
- Combine multiple clip formats in a sequence
- Try it, 8 min
- Create an audio mix
- See how, 5 min
- Animate a layered opening title sequence
- See how, 8 min
- Create an ink transition effect
- Watch, 5 min
- Create a transparent movie title
- Try it, 5 min
- Create a duotone
- Watch, 5 min
More beginner projects
- Make a composite
- Watch, 8 min
- Make a cinemagraph
- Watch, 5 min
- Make a tilt-shift effect
- Watch, 5 min
- Isolate a color
- Watch, 5 min
- Create a color-dissolve transition
- Watch, 5 min
- Add a focus pull effect
- Try it, 5 min
- Replace colors in a video
- Watch, 10 min
- Create blended visuals
- Watch, 5 min
- Sweeten the vocals
- Watch, 5 min
- Correct skin tones
- Watch, 5 min
- Create a cinematic look for your footage
- See how, 5 min
- Slow down footage
- Watch, 5 min
Using Adobe Auditionhttps://creativecloud.adobe.com/cc/learn/premiere-pro/web/audio-cleanup-premiere-audition?locale=en
Jan 23-Feb 27
Workplace Readiness https://cte-escr.org/
Jan 18
Quarter 2 Post-test
- Take the pretest in Google Classroom.
- Must be done at school.
- Do not look up answers.
December 4-January 25
Copy the folder Responsive Web Design Student Data Files from your student_files folder to your network folder. Book
Oct 30
Responsive Web Design Chapter 9
- Practice: Follow the directions DUE December 19
- Analyze Correct Improve DUE January 12

- Lab 2: Wildlife Rescue Organization DUE January 18
- Your Turn: Personal Portfolio Website DUE January 25
- Follow the directions from the book but when it says to add the audio and video to an existing page in Steps 2 and 7, I want you to make a new page for each step.
- You can save them as audio.html and video.html.
- Use Open Source files
- https://pixabay.com/
- https://commons.wikimedia.org/wiki/Commons:Free_media_resources/Video
- https://www.pexels.com/
- https://freesound.org/
- https://archive.org/details/opensource_audio
- https://archive.org/
- The video you create must be at least 30 seconds in length.
- Title
- Transitions
- Additional Audio Track
- At least two default effects or one you make.
- Use key frames.
- The audio track create must be at least 30 seconds in length.
- Mix at least three different audio files.
- Audio Transitions
- At least two default effects.
- Use key frames.
- Make sure to add the pages to your navigation and make sure they are styled like your existing pages.
October 30-December 1
Responsive Web Design Chapter 8
- Practice: Follow the directions DUE November 3
- Analyze Correct Improve DUE November 10
- Lab 2: Wildlife Rescue Organization DUE November
- Your Turn: Personal Portfolio Website DUE December 1
- Follow the directions from the book but when it says to add a page, add a gallery. You could use the html and css from the chapter but modify it so it matches your site.
September 23-October 27
Copy the folder Responsive Web Design Student Data Files from your student_files folder to your network folder. Book
Responsive Web Design Chapter 7
- Practice: Follow the directions DUE October 6
- Analyze Correct Improve DUE October 13
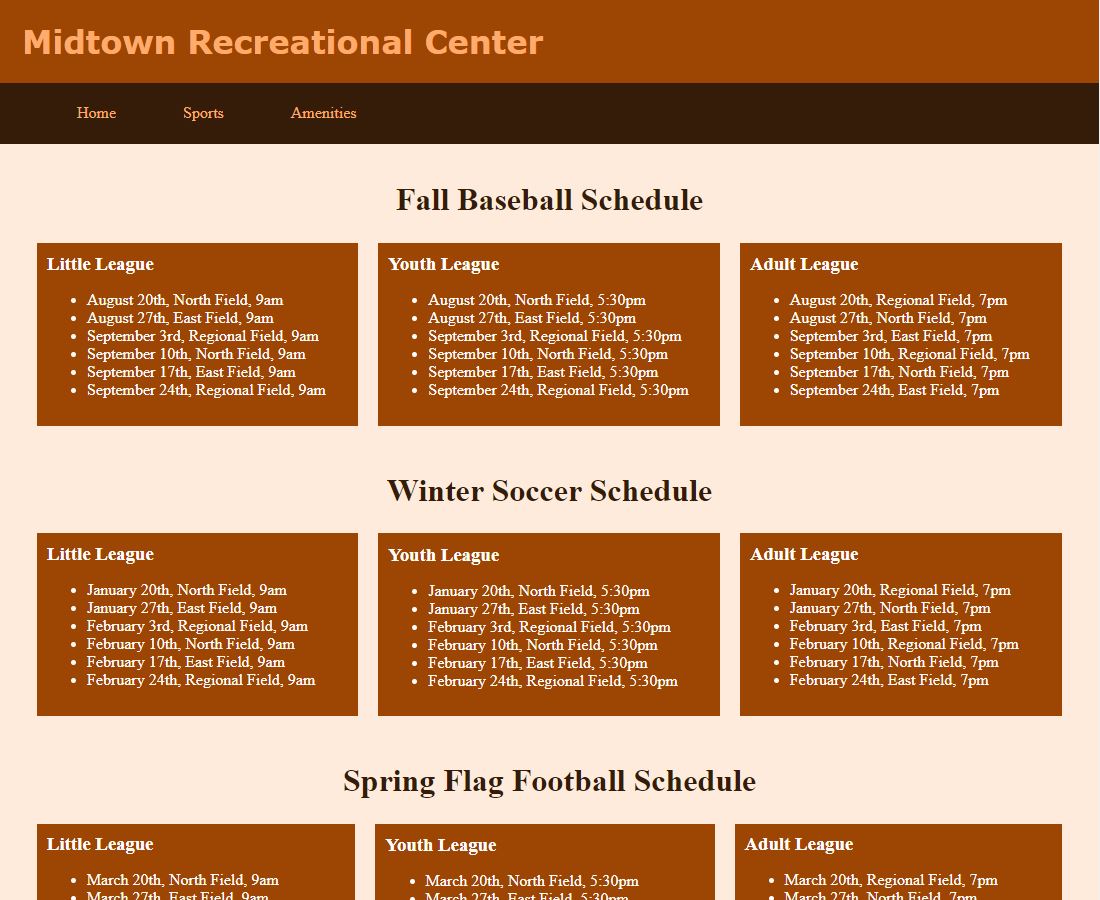
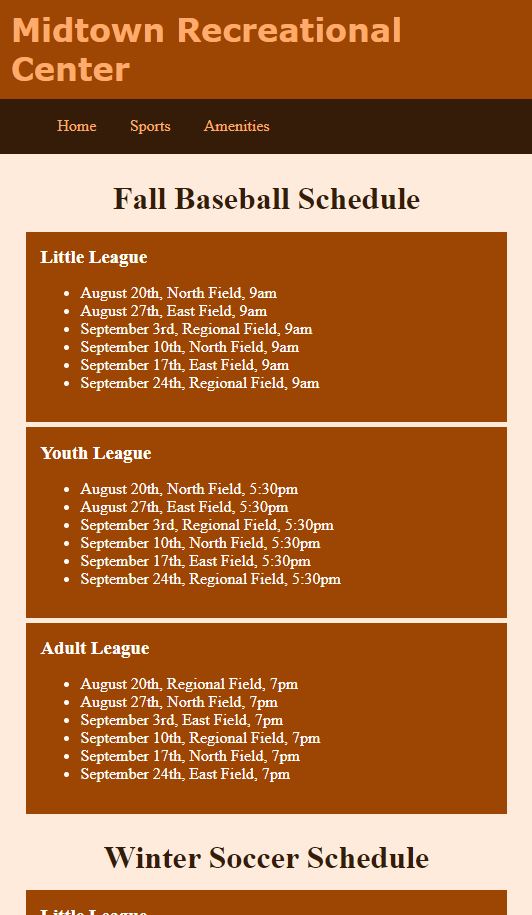
- Lab 2: Wildlife Rescue Organization DUE October 19
- Your Turn: Personal Portfolio Website DUE October 27
- Follow the directions from the book but when it says to add a page, add a gallery. You could use the html and css from the chapter but modify it so it matches your site.
September 1-22
I placed completed copies of lesson 5 in your folders. Copy the folder Responsive Web Design Student Data Files from your student_files folder to your network folder. Book
Responsive Web Design Chapter 6
- Practice: Follow the directions DUE August 31
- Analyze Correct Improve DUE September 4
- Lab 2: Wildlife Rescue Organization DUE September 11
- Your Turn: Personal Portfolio Website DUE September 22
- Copy on of the your_turn folders from the Chapter 5 folder.
- Paste it into your folder.
- Modify the site according to the directions in the book to make it your own.
Aug 22
Pretest
- Take the HTML test 1 and CSS test 1 in Google Classroom.
- Must be done at school.
- Do not look up answers.
*********************************
May 16
Copy the folder Responsive Web Design Student Data Files from your student_files folder to your network folder. Book
Responsive Web Design Chapter 5
- Practice: Follow the directions
- Analyze Correct Improve
- Lab 2: Wildlife Rescue Organization
- Your Turn: Personal Portfolio Website
May 14
Copy the folder Responsive Web Design Student Data Files from your student_files folder to your network folder. Book
Responsive Web Design Chapter 4
- Practice: Follow the directions

- Analyze Correct Improve
- Lab 2: Wildlife Rescue Organization
- Your Turn: Personal Portfolio Website
May 10
Copy the folder Responsive Web Design Student Data Files from your student_files folder to your network folder. Book
Responsive Web Design Chapter 3
- Practice: Follow the directions
- Analyze Correct Improve
- Lab 2: Wildlife Rescue Organization
- Your Turn: Personal Portfolio Website
May 5
Copy the folder Responsive Web Design Student Data Files from your student_files folder to your network folder. Book
Responsive Web Design Chapter 2
- Practice: Follow the directions. This is saved in the Chapter folder in the Responsive Web Design Student Data Files folder that you copied to your folder.
- Analyze Correct Improve: Saved in the Analyze folder
- Lab 2: Wildlife Rescue Organization: Saved in the lab2 folder.
- Your Turn: Personal Portfolio Website: Saved in the folder you create.
May 4
Copy the folder Responsive Web Design Student Data Files from your student_files folder to your network folder
Online Course: https://k12.cengage.com/portal/Launch/Index?enrollmentID=10509406&enrollmentType=course
Maybe: https://login.cengagebrain.com/course/MTPN-GKBZ-9HMV
Book: https://nglsync.cengage.com/portal/Launch/Course/NGLSYNC1111994
Responsive Web Design Chapter 1
- Practice: Follow the directions and you are making the index page.
- Analyze Correct Improve
- Lab 2: Wildlife Rescue Organization
- Your Turn: Personal Portfolio Website
Aug 21
Course requirements/expectations
- Syllabus: parents can sign ther verfication or email me at respinola@hcsdnv.com.
Assignment:
- Complete registration for websites below.
- Student Syllabus Verification
- Complete in Google Classroom
Join Quizlet
- This will be used later for Digital Learning.
- https://quizlet.com/join/qgFDQgwgN?i=1ucocb&x=1rqt
- Use your real name for your Quizlet account so you can receive credit.
- Add transition effects
- Watch, 4 min
- Import with the Media Browser
- Watch, 15 min

